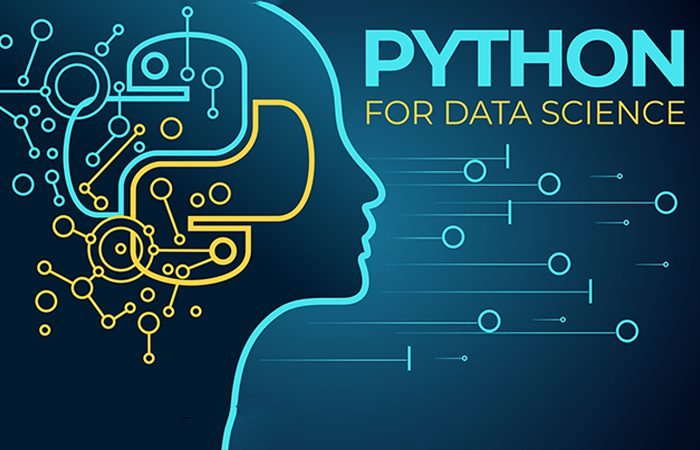
Why Learning Python Is Essential For Data Science

Python is a versatile programming language. When you learn Python, the programming language makes you competent for several job roles.

It finds applications in Data Science, Web Development, Analytics, Automation, Scripting, and Game Development.

Why is it so widely used?

Let’s explore the reasons to learn Python in the following sections.

What are the technical requirements of the Data Science industry?

Data Science and Analytics industry is based on mathematics and statistics. As a Data Scientist, technically, you will need some assistance to complete your job. These are listed below.

  • Fundamentals: You must know and learn Python programming language. Additionally, SQL is essential for understanding querying and database management.
  • Mathematics and Statistics: Creating reliable models is the main responsibility of a Data Scientist. This can only be done with sound knowledge of probability, regression analysis, hypothesis testing, and linear algebra.
  • Data Analysis and Manipulation: A Data Scientist performs data manipulation and analysis regularly. The programming language used for this job must help with feature engineering and data cleaning.
  • Big Data Technologies: Along with the fundamentals, you must learn frameworks. Apache Hadoop, Dask, or Apache Spark frameworks efficiently analyze and process massive databases.
  • Machine Learning: A Data Scientist must know machine learning algorithms. They help in performing regression, clustering, and classification.

Why should Data Scientists learn Python over other languages?

Data Analytics Course

When you learn Python for Data Science and Analytics, each lesson will speak of the language’s relevance in the field.

Listed below are the reasons that make Python important for Data Scientists.

If you’re wondering the reason for choosing Python over other languages, keep reading.

Simplicity: When compared with C, C++, or C#, Python is easy to learn. Data Scientists can learn the language easily and start coding in no time. The syntax of Python is simple and almost in the English language.

This enables you to focus on problem-solving instead of bothering yourself with the format of a new language. It does not just help you with the process, but it also enables teamwork. This means you can collaborate with others to complete a project on time.

Library: Python is popular for its vast library. When you talk about Data Science, the language offers one of the largest collections of frameworks and libraries. These are specific to Data Science and Analytics. For example, NumPy, Matplotlib, and Pandas are important libraries.

Support for Artificial Intelligence (AI): Tensorflow is one of the most useful libraries in Python for AI. The language also offers other frameworks and libraries. You can use these for building and training complex models. With Python, you can also integrate machine learning pipelines directly into the production systems.

Integration: In the previous section, you must’ve learned the importance of Big Data Technologies, SQL, and Visualization Tools. Python is compatible with SQL, Hadoop, and Tableau to enhance your capabilities as a Data Scientist. You can also integrate your Python code with other programming languages.

These reasons compel professionals to learn Python for Data Science and Analytics. However, you must note that programs like R, MATLAB, and Julia also help in Data Science. But, the simplicity of Python and its vast library has made it the top choice of professionals.

Join a job-assured Postgraduate Data Science & Analytics Course

As Python is lightweight, with extensive libraries, and customer support, the demand for this program is not getting down anytime sooner. When you become a data science expert, you must have a clear understanding of the fundamentals. Strengthen your concepts of mathematics and statistics and learn machine learning.

A Postgraduate Data Science and Analytics Course will direct your career in the right direction. Imarticus Learning presents a job-centric curriculum to make the most of your investment. You will also get assistance for participating in Hackathons that add value to your resume. Get ahead of your competitors by starting your journey today!

How to get started in Python: An overview of recent trends

Are you very interested in programming? Then you need to know the programming language Python. No, it’s not exactly about pythons and snakes, so you can let your puppy loose.

Why Python, specifically? It’s approachable, simple, and adaptable to a range of situations. And because a growing number of programmers all around the world are using and appreciating it.

In fact, according to a recent rating published by IEEE Spectrum (a prestigious engineering and applied science newspaper), Python will be the most used programming language in 2020, followed by JavaScript, C++, C, and Java.

Python’s popularity has been stable in recent years, and this trend is unlikely to reverse. Python tutorials are the most popular on Google, according to the PYPL portal, and everyone wants to learn Python nowadays.  

This explains why Dropbox, Netflix, Facebook, Pinterest, Instagram, and Google all employ Python in their technical growth. Additionally, NASA is included in this list of “tech celebrities” that use Python. Do you see why it’s important for you to be aware of it?

Python is quite popular, and everyone wants to learn more about it. You, too, would not be reading this article if you weren’t.

Projects and programs made in Python

  • Netflix

Netflix, the platform that had a growth of 16 million subscribers during the first quarter of 2020, also uses Python. Its engineers prefer this programming language mainly because of its available libraries.

  • Instagram

Yes, the app you use to share images frequently uses the Python programming language on its backend (what runs on a server). In other words, Instagram is implemented on the open-source web development framework Django which is written entirely in Python.

  • Google

This is one of the big projects that also use the Python programming language, in addition to C++ and Java.

What are the characteristics of Python?

The Python programming language is known for being simple, quick, and having a short and easy learning curve. It is free to use and share because it was created under an open-source license.

But what does “multi-platform”, “multi-paradigm” and “interpreted” mean, here is the explanation:

– Multi-platform: Python can operate on a variety of platforms, including Windows, Mac OS X, Linux, and Unix.

– Multiparadigm: Because it is a programming language that allows a variety of programming paradigms (development models), programmers are not forced to utilize a particular style. Python supports which programming paradigms? Programming styles include object-oriented, imperative, and functional programming.

– Interpreted: Python “interprets” the programmer’s code, which implies it both interprets and executes it.

Python may also be used as an extension language for applications that require a programmable interface since it is dynamically typed (when a variable can take values of multiple kinds or adapts to what we write).

What is Python and what is it for?

Python is a multi-paradigm, multi-platform interpreted programming language used mostly in Big Data, Artificial Intelligence (AI), Data Science, testing frameworks, and web development. Due to its vast library, which has a wide range of features, it qualifies as a high-level general-purpose language.

In 1989, Guido van Rossum, a Dutch programmer, decided to construct an interpreter for a new scripting language he was developing.

His significant expertise in creating the ABC system – an interactive, structured, high-level programming language – aided his efforts to develop a language that was more intuitive, simpler, more powerful. Python, the successor of the ABC language, was born in 1991 (yep, he is a millennial at 29 years old).

Conclusion

At Imarticus we offer a Data Analytics course where you will learn more about how to get started in Python and you will receive more than an overview of recent trends. Visit our website today and enroll in one of our analytics programs. 

Here’s how to create your first desktop application in python

Most young developers have questions about creating desktop software using python. But before going into the process of developing a desktop application, they should learn python programming beforehand to learn concepts related to python.

Step By Step Guide to Create a GUI App in Python

Step 1

In this step, define the current task. Deciding what needs to be solved with the application explains further steps. The field has a variety of usage, for example, Data Visualizations, personal application performance to work with images, text, Business automation GUI’s for managing tasks, and developing systems and monitoring.
best ai and ml coursesPrimary estimation of the functionality and size of the application is necessary as it will help choose the best-suited GUI tool kit.

In case you are not familiar with Graphical User Interface (GUI), it is recommended to take any of the available AI and machine learning courses to clear the fundamentals.  

Step 2   

Choose the correct GUI package and play around with it using python. There are multiple Python-based packages available to do this. One of the easiest ways to do so is by using Tkinter. It allows developers to create small and simple applications using a GUI interface. Popular third-party packages include PyQt, Kivy, WxPython, and Pyside. To know about these, individuals can look at the Python desktop application development tutorial.

Step 3

Here PyQt5 is used as a GUI toolkit for the desktop application. Next, download and install the package.

Step 4 

Then create a pyqt_app1.py file to import PyQt5 modules. After creating PyqtApp class, in the _init_function, in the bottom, create and import instruction with a file name with if _name+ == “_main”: and type lines with calling pyqt based app, importing sys module, calling show () to start the GUI application.

from PyQt5 import QtWidgets, QtGui, QtCore

class PyQtApp(QtWidgets.QWidget):


    def __init__(self, parent=None):

        QtWidgets.QWidget.__init__(self, parent)

        self.setWindowTitle(“PyQt Application”)

        self.setWindowIcon(QtGui.QIcon(“Your/image/file.png”))


if __name__ == “__main__”:

    import sys

    app = QtWidgets.QApplication(sys.argv)

    myapp = PyQtApp()

    myapp.show()

    sys.exit(app.exec_())


Step 5

Then add some style, font, and position of the application. Change the background colour by altering the line – self.element.setStyleSheet(“background-color: #hex number or rgba(). But to position the window, a desktop resolution is required. But this can be done by using multiple codes.

from PyQt5 import QtWidgets, QtGui, QtCore

class PyQtApp(QtWidgets.QWidget):


    def __init__(self, parent=None):

        QtWidgets.QWidget.__init__(self, parent)

        self.setWindowTitle(“PyQt Application”)

        self.setWindowIcon(QtGui.QIcon(“Your/image/file.png”))

        self.setMinimumWidth(resolution.width() / 3)

        self.setMinimumHeight(resolution.height() / 1.5)

        self.setStyleSheet(“QWidget {background-color:

                           rgba(0,41,59,255);}

                           QScrollBar:horizontal {

                           width: 1px; height: 1px;

                           background-color: rgba(0,41,59,255);}  

                           QScrollBar:vertical {width: 1px;

                           height: 1px;

                           background-color: rgba(0,41,59,255);}”)


if __name__ == “__main__”:

    import sys

    app = QtWidgets.QApplication(sys.argv)

    desktop = QtWidgets.QApplication.desktop()

    resolution = desktop.availableGeometry()

    myapp = PyQtApp()

    myapp.setWindowOpacity(0.95)

    myapp.show()

    myapp.move(resolution.center() – myapp.rect().center())

    sys.exit(app.exec_())

else:

    desktop = QtWidgets.QApplication.desktop()

    resolution = desktop.availableGeometry()


Step 6

In this step, adding functionality to the app is necessary. After all, while solving tasks, a graphical interface will make the user comfortable using the application. We can also add frames, fields, buttons and other graphics into the application. Using buttons and text fields will provide good and effective results. For best view buttons, here is how to create a new class for the application with styling and font.

from PyQt5 import QtWidgets, QtGui, QtCore

font_but = QtGui.QFont()

font_but.setFamily(“Segoe UI Symbol”)

font_but.setPointSize(10)

font_but.setWeight(95)


class PushBut1(QtWidgets.QPushButton):


    def __init__(self, parent=None):

        super(PushBut1, self).__init__(parent)

        self.setMouseTracking(True)

        self.setStyleSheet(“margin: 1px; padding: 7px;

                           background-color: rgba(1,255,0,100);

                           color: rgba(1,140,0,100);

                           border-style: solid;

                           border-radius: 3px; border-width: 0.5px;

                           border-color: rgba(1,140,0,100);”)


    def enterEvent(self, event):

        self.setStyleSheet(“margin: 1px; padding: 7px;

                           background- color: rgba(1,140,040,100);

                           color: rgba(1,140,255,100);

                           border-style: solid; border-radius: 3px;

                           border-width: 0.5px;

                           border-color: rgba(1,140,140,100);”)


    def leaveEvent(self, event):

        self.setStyleSheet(“margin: 1px; padding: 7px;

                           background-color: rgba(1,255,0,100);

                           color: rgba(1,140,0,100);

                           border-style: solid;

                           border-radius: 3px; border-width: 0.5px;

                           border-color: rgba(1,140,0,100);”)

class PyQtApp(QtWidgets.QWidget):


    def __init__(self, parent=None):

        QtWidgets.QWidget.__init__(self, parent)

        self.setWindowTitle(“PyQt Application”)

        self.setWindowIcon(QtGui.QIcon(“Your/image/file.png”))

        self.setMinimumWidth(resolution.width() / 3)

        self.setMinimumHeight(resolution.height() / 1.5)

        self.setStyleSheet(“QWidget

                           {background-color: rgba(1,255,0,100);}

                           QScrollBar:horizontal

                           {width: 1px; height: 1px;

                           background-color: rgba(0,140,0,255);}

                           QScrollBar:vertical

                           {width: 1px; height: 1px;

                           background-color: rgba(0,140,0,255);}”)

        self.textf = QtWidgets.QTextEdit(self)

        self.textf.setPlaceholderText(“Results…”)

        self.textf.setStyleSheet(“margin: 1px; padding: 7px;

                                 background-color:      

                                 rgba(1,255,0,100);

                                 color: rgba(1,140,0,100);

                                 border-style: solid;

                                 border-radius: 3px;

                                 border-width: 0.5px;

                                 border-color: rgba(1,140,0,100);”)

        self.but1 = PushBut1(self)

        self.but1.setText(“”)

        self.but1.setFixedWidth(72)

        self.but1.setFont(font_but)

        self.but2 = PushBut1(self)

        self.but2.setText(“”)

        self.but2.setFixedWidth(72)

        self.but2.setFont(font_but)

        self.but3 = PushBut1(self)

        self.but3.setText(“”)

        self.but3.setFixedWidth(72)

        self.but3.setFont(font_but)

        self.but4 = PushBut1(self)

        self.but4.setText(“”)

        self.but4.setFixedWidth(72)

        self.but4.setFont(font_but)

        self.but5 = PushBut1(self)

        self.but5.setText(“”)

        self.but5.setFixedWidth(72)

        self.but5.setFont(font_but)

        self.but6 = PushBut1(self)

        self.but6.setText(“”)

        self.but6.setFixedWidth(72)

        self.but6.setFont(font_but)

        self.but7 = PushBut1(self)

        self.but7.setText(“”)

        self.but7.setFixedWidth(72)

        self.but7.setFont(font_but)

        self.grid1 = QtWidgets.QGridLayout()

        self.grid1.addWidget(self.textf, 0, 0, 14, 13)

        self.grid1.addWidget(self.but1, 0, 14, 1, 1)

        self.grid1.addWidget(self.but2, 1, 14, 1, 1)

        self.grid1.addWidget(self.but3, 2, 14, 1, 1)

        self.grid1.addWidget(self.but4, 3, 14, 1, 1)

        self.grid1.addWidget(self.but5, 4, 14, 1, 1)

        self.grid1.addWidget(self.but6, 5, 14, 1, 1)

        self.grid1.addWidget(self.but7, 6, 14, 1, 1)

        self.grid1.setContentsMargins(7, 7, 7, 7)

        self.setLayout(self.grid1)


if __name__ == “__main__”:

    import sys

    app = QtWidgets.QApplication(sys.argv)

    desktop = QtWidgets.QApplication.desktop()

    resolution = desktop.availableGeometry()

    myapp = PyQtApp()

    myapp.setWindowOpacity(0.95)

    myapp.show()

    myapp.move(resolution.center() – myapp.rect().center())

    sys.exit(app.exec_())

else:

    desktop = QtWidgets.QApplication.desktop()

    resolution = desktop.availableGeometry()

Step 7

You can add a few more fields and explore the possibilities of PyQt.

Step 8

Then connect the buttons and functions for a calling event. For this, we need to add an additional line to the  _init_ function of the main class.

self.but1.clicked.connect(self.on_but1)

Step 9

You can add images in this step. The second button in the image will call the image file from the text to put it in the right bottom corner. 

Adding QLabel: 

self.lb1 = QtWidgets.QLabel(self)

self.lb1.setFixedWidth(72)

self.lb1.setFixedHeight(72)


Adding function:

def on_but2(self):

    txt = self.textf.toPlainText()

    try:

        img = QtGui.QPixmap(txt)

        self.lb1.setPixmap(img.scaledToWidth(72,

                           QtCore.Qt.SmoothTransformation))

    except:

        pass

To connect the second button and the function: 

self.but2.clicked.connect(self.on_but2)

Step 10

Complete and run the application. Apart from this PyQt has various other applications, and you can use those to create complete desktop applications.

 If you are not familiar with coding, you can learn python programming or enroll in any AI and machine learning courses. Apart from this, you can also look at the Python desktop application development tutorial

Level 1
Copyscape Premium Verification Text Clear, But Code Matched
Grammarly Premium Score 96
Readability Score 12.1
Primary Keyword Usage Done
Secondary Keyword Usage Done
Highest Word Density  Self – 7.39% 
Data/Statistics Validation Date
Level 2
YOAST SEO Plugin Analysis 3 Green, 4 Red
Call-to-action Tone Integration NA
LSI Keyword Usage NA
Level 3
Google Featured Snippet Optimization NA
Content Camouflaging NA
Voice Search Optimization NA
Generic Text Filtration Done
Content Shelf-life